Last Updated on May 22, 2026 by Kari-Ann Ryan
That approach is how motors burn out, belts slip off rollers, and someone ends up in an urgent care waiting room with a crushed toe or a herniated disc. Before deciding whether to handle this yourself, it is worth reading through the real case for hiring professional movers instead of renting a truck — especially when the equipment involved costs thousands of dollars to repair or replace.
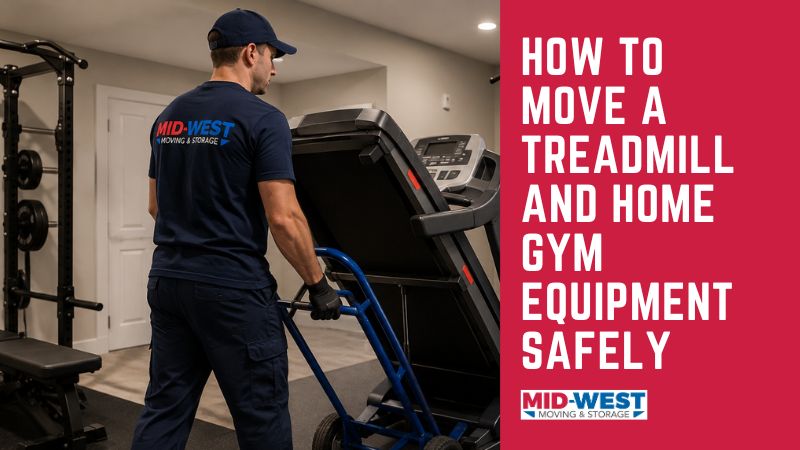
A treadmill is precision equipment. The motor is heavy and sits off-center. The belt is tensioned to specific tolerances. The frame flexes under load in ways that can misalign internal components if the machine is tilted wrong or jolted during transport. Moving one safely requires understanding what you are actually dealing with, not just following a generic checklist. This guide is built for people who want to do this right the first time.
What Makes Treadmills So Difficult to Move
Before you touch anything, it helps to understand why treadmills give so many people trouble.
The weight is the obvious problem, but it is not the whole story. A budget treadmill runs around 254 pounds. A mid-range machine with a solid motor and decent deck cushioning lands between 250 and 300 pounds. Commercial-grade treadmills with 3.5 horsepower motors average 339 pounds. Curved, non-motorized treadmills, which feel lighter because there is no electrical system, still weigh over 400 pounds because the frame has to support the mechanical resistance system.
The real problem is where that weight sits. The motor and flywheel are mounted at the front of the machine. The back end is comparatively light. That imbalance means two people of equal strength lifting from opposite ends are not sharing the load equally. The person at the front is handling significantly more weight, and that weight shifts as the machine tilts. What feels stable on flat ground becomes unpredictable on a staircase.
Beyond the weight, treadmills have components that do not tolerate rough handling. The motor is connected to the belt through a drive roller. The belt itself sits on a deck that is tensioned from both sides. If the machine is laid on its side, gravity pulls the belt off-center. If it is jolted hard during loading or transport, internal wiring can pull loose from terminals. The console, if it is a folding model, can crack at the hinge point if it is not locked properly before moving.
These are not hypothetical risks. They are the most common reasons people end up paying for a service call the week after moving into a new home.
The Injuries Nobody Talks About
Gym equipment moving guides almost always mention “back strain” and leave it there. Here is what actually happens when this goes wrong.
- Spinal disc herniations are one of the most common serious injuries in residential moving, and heavy, awkward gym equipment is a leading cause. The disc does not usually herniate from a single dramatic lift. It happens when someone is already fatigued, shifts their weight slightly to correct for a machine that is tilting, and the spine takes a load it cannot handle at that angle.
- Knee and ankle injuries happen when movers try to slow a tipping machine by planting a foot. The instinct is right. The outcome is often a torn ligament or a fractured ankle.
- Lacerations from folding bench hardware are more common than most people expect. The hinge mechanisms on adjustable benches can snap closed with significant force when the locking pin is not engaged. A finger or forearm caught in that hinge does serious damage.
- Toe and foot fractures happen when a dumbbell or weight plate shifts in a box that was packed too full or carried at an awkward angle. Cast iron has no give. Feet do.
None of this is meant to scare anyone out of moving their own equipment. It is meant to explain why preparation is not optional.
What to Sort Out Before the Treadmill Moves an Inch
Build a Complete Inventory
Do not try to work from memory. Walk through the gym and write down every piece of equipment, including things that feel trivial. Note the brand, model, approximate weight, dimensions, and power requirements for anything that plugs in. A 120V outlet is standard. A 240V outlet, which some commercial-grade treadmills require, is not always available in every room of a new home, and finding that out after the machine is already set up in the wrong room wastes a full day.
This inventory also serves as your checklist at the destination. If something gets left on a truck or placed in the wrong room, you catch it before the movers leave.
Measure Everything, Including What You Think You Already Know
Doorway widths vary more than people realize. Standard interior doors are 32 inches wide, but older homes sometimes run narrower, and the clearance is further reduced by the door frame and trim. A treadmill deck that is 36 inches wide cannot go through a 32-inch opening without disassembly, regardless of how you angle it.
Measure hallway width, stairwell width, ceiling height on stairwells (machines tipped on a dolly are taller than they look), and the dimensions of the room where the equipment will live in the new space. Confirm the equipment fits before the truck arrives.
Pull the Owner’s Manual
If you do not have it, the manufacturer’s website almost always has a digital copy. Read the disassembly section before you need it, not while you are standing in front of a half-dismantled machine trying to figure out what order the steps go in.
Check the warranty section too. Some manufacturers specify that disassembly must be performed by an authorized technician or it voids the warranty. If your machine is still under warranty and it is a significant one, that is worth a call to the manufacturer before moving day.
Photograph the assembled machine from four angles, plus any close-ups of cable routing, bracket positions, or anything that snaps or clips together. These photos will be more useful than any written instruction during reassembly.
The Right Tools for Moving Heavy Gym Equipment
- Appliance dolly: You need one rated for at least 600 pounds, with a working strap. The strap is not optional. A treadmill that is not strapped to a dolly will shift the moment the angle changes. The dolly wheels should be large enough to handle thresholds and slight inclines without catching.
- Moving blankets: Plan for more than you think you need. You will use them on the machine, on the floors along the route, and over doorframes. Thin blankets bunch up and slide. Thick moving blankets stay in place.
- Shrink wrap: This is what secures the treadmill belt, the folding deck, and any other moving parts before the blankets go on. It also holds the blankets in place so they do not slide off mid-move.
- Furniture sliders: These go under the machine before you start moving it across hard floors so you can reposition without lifting. They save effort and protect the floor.
- Reinforced boxes or heavy-duty plastic bins: For free weights, plates, and accessories. Cardboard boxes work until they absorb moisture from sweat or condensation, which can happen even in a short move. Plastic bins with lids are more reliable for anything dense.
- Bubble wrap: For console displays, mirrors, and anything with a screen or glass component.

Moving the Treadmill: The Full Process
Prep the Machine
Clean it first. Wipe down every surface with antibacterial wipes or a diluted vinegar solution. Sweat and grime left on the machine can dry out rubber components during transit and create a residue that is harder to clean later. Unplug the power cord and secure it to the frame with a zip tie or tape so it does not drag.
If the treadmill folds, lift the walking deck to the upright position and verify the locking mechanism is fully engaged. Give it a firm push to confirm it is not going to release under pressure. If it releases accidentally while someone is behind it, the deck swings down fast and hard.
Protect the Route
Before the machine moves an inch, lay blankets or cardboard along the entire path from its current position to the truck. Tape them down at the edges. Add padding to every doorframe corner along the route. This step takes ten minutes and prevents floor damage that costs hundreds or thousands of dollars to repair.
Clear the path completely. Remove any furniture, rugs, decorations, or anything else that someone could catch a foot on while backing a 300-pound machine through a doorway.
Wrap Before You Roll
Shrink wrap the belt and any moving parts first. Then cover the entire machine in moving blankets, overlapping them so there are no gaps at the corners or edges. The goal is that the machine can contact a wall, a doorframe, or the inside of a truck without scratching either surface.
Position the Dolly Correctly
Tilt the treadmill back slightly and slide the dolly underneath the front end, where the motor is. This is the heavier end, and it should be the end sitting on the dolly platform, not hanging off the side. Strap the machine to the dolly at two points if possible: one strap near the top, one near the base.
Move Slowly and Communicate
Before anyone takes a step, agree on who is directing and who is following. The person at the back of the dolly controls the direction. The person at the front guides and watches for obstacles. Call out every step change, every threshold, every turn before it happens. Surprises are how people get hurt.
On stairs, the person at the bottom bears the weight and controls the pace. Take one step at a time. Stop and reassess if anything feels unstable. There is no version of this where moving faster is worth the risk.
Load the Truck Upright
Load the treadmill into the truck standing upright, not laid on its side. Flat-loading shifts the belt off center and puts lateral stress on the motor mounts. Once upright in the truck, strap it to the wall so it cannot tip or shift in transit. Place soft items around the base to prevent it from rocking.
How to Move Every Other Piece of Gym Equipment
- Dumbbells and free weights: The 50-pound-per-container rule is not a suggestion. It is the threshold above which most people start compensating their posture to carry the load, which is when backs go out. Two half-full bins are always safer than one full one.
- Weight plates: Use plastic bins with handles. Pack smaller plates on top, larger plates on the bottom for stability. Wrap Olympic bars in moving blankets and secure with tape so the collars do not roll off during transport.
- Squat racks and power cages: These almost always need partial disassembly. Remove the pull-up attachment, safety arms, j-hooks, and any weight pegs before moving the uprights. The uprights themselves are manageable for two people once the hardware is off. Keep all the hardware in labeled bags taped to the corresponding upright.
- Cable machines and functional trainers: Remove the weight stack if possible before moving the frame. Weight stacks are often more than 200 pounds on their own and are attached with a single pin. Sliding that pin out makes the machine significantly lighter and much easier to move safely.
- Adjustable benches: Lock every hinge point before moving. If the bench does not have a lock, shrink wrap it in the flat position so the back pad cannot fold up unexpectedly. Two people minimum, three for anything with a rack attachment.
- Cardio equipment (bikes, rowers, ellipticals): Bikes and rowers are typically lighter than treadmills but have long frames that are awkward through doorways. Measure before moving day. Most can be moved without disassembly but benefit from having pedals removed to reduce width.
After the Move: Reassembly and Calibration
Reassemble in reverse order using your photos as the guide. Do not rely on memory or the written instructions alone because photos capture things the manual does not mention, like the exact routing of a cable or the orientation of a bracket that looks symmetrical but is not.
Once the treadmill is back together, do not skip calibration. Run the machine at a slow speed for two to three minutes and watch the belt tracking. If the belt drifts to one side, the tension rollers need adjustment. Most treadmills have a manual adjustment bolt at each rear corner. Turning it clockwise tightens that side and pulls the belt back toward center. Make small adjustments, a quarter turn at a time, and let the belt stabilize before adjusting again.
Check that the emergency stop lanyard is functional before anyone runs on the machine. It is a simple test and the most important one.
When the Job Is Bigger Than a DIY Move
Some situations genuinely call for professional help, and recognizing them before the move starts is better than recognizing them halfway through.
Multiple flights of stairs with no elevator is the clearest line. Getting a 300-pound machine up two flights without the right equipment and enough trained people is not a DIY job. It is exactly the situation where people get seriously hurt, and where equipment gets damaged beyond repair.
Long-distance moves add another layer of risk. The equipment is in transit longer, subjected to road vibration and temperature changes, and handled by people at both ends who may not know each other’s pace or communication style. What holds together for a 20-minute local move can shift, loosen, or disconnect over several hours on the road.
Commercial-grade treadmills over 400 pounds require tools and technique that go beyond what most households can reasonably put together. The cost of hiring professionals for a single heavy piece is almost always less than repairing or replacing a machine that was handled wrong.

If the equipment is still under a manufacturer’s warranty, check whether that warranty requires professional handling for transport. Some do, and finding that out after a warranty claim gets denied is a costly lesson.
For anyone in the Chicagoland area, Mid-West Moving & Storage has handled treadmills, home gyms, and specialty equipment for decades. Their crews are licensed, bonded, and insured, and they handle disassembly, transport, and reassembly as part of the moving service, not as an add-on you negotiate after the fact. Short-term storage is available too, which matters when the new space is not ready the day the old one needs to be cleared.
Treadmill Moving Related FAQs
Is it safe to move a treadmill on its side?
No. Moving a treadmill on its side causes the belt to shift off the rear roller and puts lateral stress on the motor mounts the machine was not built to handle. Treadmills should always be transported upright, strapped securely to an appliance dolly, and loaded into the truck in the standing position.
How many people do you need to move a treadmill?
At minimum two people on flat ground. Three people for staircases, tight hallways, or sharp turns. Because the motor sits at the front, the person on that end is always carrying significantly more weight than the person at the back. A third person to guide and stabilize on stairs is not optional, it is the difference between a controlled move and a dangerous one.
What is the best way to move a squat rack or power cage?
Partial disassembly is almost always required. Remove the pull-up bar, safety arms, j-hooks, and weight pegs before attempting to move the uprights. The uprights are manageable for two people once the hardware is off. Keep all removed hardware in labeled zip-lock bags taped directly to the corresponding part of the frame so nothing gets mixed up or lost.
How do you protect floors when moving a treadmill?
Lay moving blankets or heavy cardboard along the entire route before the machine moves. Tape them down at the edges so they do not slide. Add padding to doorframe corners and any sharp edges along the path. Use furniture sliders under the machine when repositioning it on hard floors. One unprotected scrape across hardwood or tile can cause damage that costs far more to repair than the blankets cost to rent.
How much does it cost to have a treadmill moved?
The cost to have a treadmill moved professionally ranges from $100 to $400 for a local move. That range shifts depending on the weight of the machine, how many flights of stairs are involved, and whether disassembly and reassembly are part of the service or quoted separately. A lightweight folding treadmill on a single floor costs less to move than a 300-pound machine that needs to come down a staircase and be partially taken apart to fit through a doorway. Long-distance moves and commercial-grade treadmills will push the cost higher. Before booking, confirm exactly what the quote includes so there are no surprises on moving day.
How heavy is a ProForm treadmill to move?
ProForm treadmills vary in weight depending on the model. Entry-level and folding ProForm models typically weigh between 150 and 220 pounds, which puts them on the lighter end of the residential treadmill range. Mid-range ProForm models with larger motors and longer decks generally weigh between 220 and 280 pounds. The heavier ProForm Pro and Carbon series models can reach 300 pounds or more. Because ProForm builds both compact folding treadmills and full-size performance machines, the best way to confirm the exact weight of your specific model is to check the specifications label on the frame or look up the model number on the ProForm website.

Director of Marketing & Development
Kari-Ann Ryan is a dynamic marketing strategist with a proven track record in brand development, corporate visibility, and business growth. As the Director of Marketing & Development for Mid-West Moving & Storage and Chicago Office Movers, she leads all branding, marketing, and business development initiatives, driving awareness and engagement across multiple industries.
With extensive experience in multi-brand marketing, nonprofit fundraising, event planning, and retail management, Kari-Ann brings a comprehensive and results-driven approach to her role. She is a dedicated leader in the business community, actively involved in the Schaumburg Business Association and the GOA Regional Business Association. She also serves as a Board Member for the Alzheimer’s Association Illinois Chapter, reinforcing her commitment to advocacy and philanthropy.
In addition to her corporate role, Kari-Ann is the founder of LMJ’s Lost Souls – Alzheimer’s Fund, a nonprofit organization dedicated to awareness, education, and fundraising for Alzheimer’s research and support.
She holds a Bachelor of Business Administration in Marketing from Western Michigan University and is Certified in Constant Contact Email Marketing, with expertise in social media strategy and digital engagement.